Chapter 9 Sim UI Facilitator Dashboard
This section explains how to use the Facilitator Dashboard to set up and manage teams. It also explains how to set up Team Time (tt) report content.
You Will Need to Be Registered as a Facilitator in:
- The Facilitator group in Epicenter.
- Each group you are managing.
9.1 Orientation to the Dashboard

- Select Team - Use this dropdown to select your desired team. It will enable you to monitor their experiments.
- Go to Current Session/Home - Use these buttons to go to the teams’ session. If the “Go to Current Session” button is washed out, there is no current session. Use the “Home” button to go to the teams’ Home page.
- Gauges - This indicates the teams’ progress with a selected experiment. Teams receive 20% completion for a minimum 50 characters input for each of the Question, Hypothesis, Findings, Decisions fields and another 20% for running the experiment.
- Select Experiment - Use this dropdown to select the desired experiment to monitor. An experiment will not show in this dropdown until it has been named and saved.
- Team Average Completion - If the team runs multiple experiments, this gauge shows the average completion of the experiments.
- Team Roster - Lists team members, their clinical role and team role.
- Team Statistics - Lists experiments, when they started and ended, total time-on-task, team size, attendance percentage and completion percentage.
- Team Setup - Click this button to set up a team. It provides team setup input screens and a means to load Team Data. See the section on team setup below.
- tt Admin - Use this button to set up the contents that will show in the tt1-3 reports. See the section on tt admin below.
- Manage Multiple Teams - Select additional teams to monitor using this dropdown.
- ADD TEAM - Click this button to add an unlimited number of teams to the dashboard.
9.2 Set Up a Team

- Click the “Add” button. A Team Setup popup will appear. The Team Setup will not list all teams in Epicenter. It will only list teams assigned to the facilitator.

- Add the team name. Just add the teams’ root name. The setup function will add “team” and “ind” extensions in Epicenter.
- Type the teams’ vision statement.
- Select the Research Arm.
- Click “Add” button to add a team member. A Add Team Members popup will appear. Facilitators do not need to register with the team, because the system will automatically assign based on the login. However, a co-facilitator would have to be listed and assigned to the facilitator role.

- Enter First Name, Last Name, Email and Clinical Role information.
- Use the Select Role to select team members’ role on the team.
- Click “Add” button.
- Click the checkbox next to a name and “Edit” or “Delete” to update information or delete a team member.
- Click “Done” button when finished.
9.3 Set up a Facilitator Individual Team (_ind)
- Facilitators can go into any team session where they are listed as a facilitator.
- The Sim UI uses that listing to build the Select Team dropdown in the Facilitator Dashboard.
- A Facilitator cannot be assigned a world using the same alias, so a workaround is needed.
- The procedure below will explain how to use an additional alias to create and access a personal individual team.
- After following the procedure, your individual _ind will be on your dropdown list.
- Navigate to Team Setup
- Select any _ind_team from Team Setup listing and click Edit.
- In the Edit Team Setup popup click Add.
In the Add Team Members popup, enter your first name, last name, select Team Lead in Select Role dropdown, enter your name (example: James Rollins) again in the Enter Email field and enter your Clinical Role. Click Add, then Done. Your name is now your alternate alias to be used for _ind teams.
Be sure to note the alias under the Email column, this will appear in the Team dropdown in the Facilitator Dashboard.
9.4 Manage Team Data

- Click the “Add” button to add a new team data file. The File Manager popup will appear.

- Go to the desired file location and click on the file.
- Click “Open” to upload the file.
Please Note.
- The upload routine must update multiple GitHub repositories and Epicenter, which may take a few minutes. If the file does not appear, try clicking the “Refresh” button.
- Do not attempt to upload Team Data file directly to Epicenter, since the GitHub repository will overwrite the files on the next update and they will not work when you try to access them from the Sim UI.
9.5 Produce team_time report
This section explains how to use the Facilitator Dashboard to set up and manage team time (tt) reports.
9.5.1 Set up a Blue TT Report
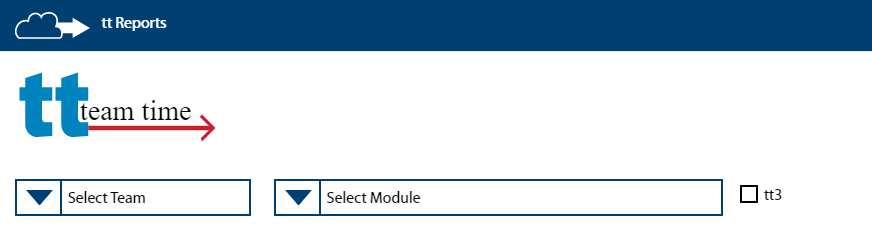
- The tt Reports popup allows you to select your team, select experiments to display and the specific charts you want to display in the report.
- For the Psychotherapy Module, Sankey charts are displayed by default.
- Psychotherapy charts active in the Sim UI Team Data Table are also active in the tt report Team Data Table.
- A team can have only one module at a time displayed on the tt report.
- If you choose a different module, it will re-render the tt report page to the selected module.
Select tt Admin from the Facilitator Dashboard. The tt Reports popup will appear.
- TT 1 Report: If you are producing the 1st tt report, skip to step 5 by signing into mtl.how/menu.

Select your team and the module they are using.
- TT 3 Report: If you are producing the last tt report, check the tt3 box.
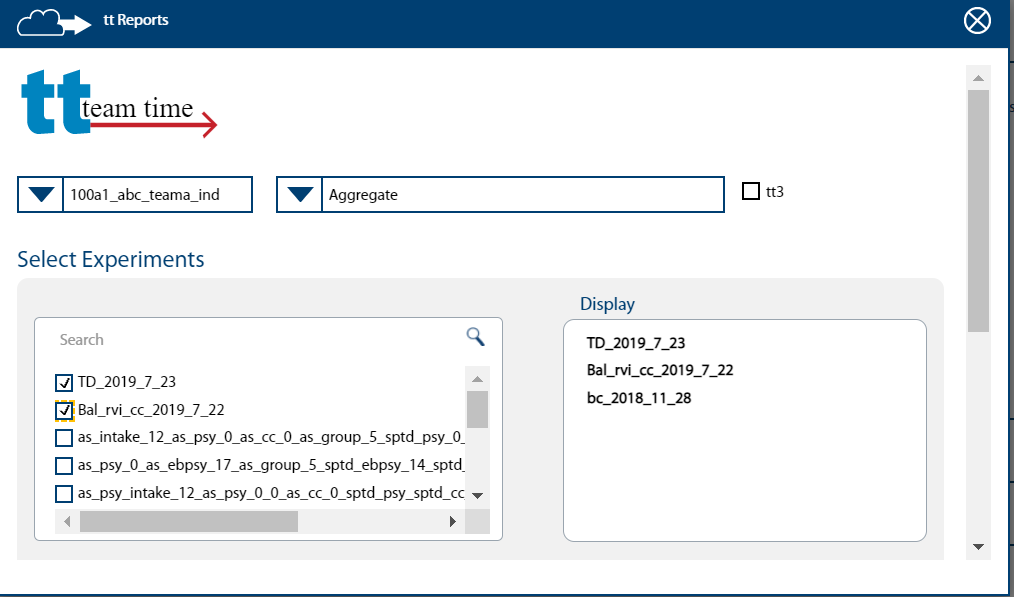
Experiments should populate under the Select Experiments section with the teams’ saved experiments. Select your desired experiments. Checked experiments will appear in the Display list. If you are changing experiments only, be sure to scroll down and click and click the Save button.
- Regardless of the list order, experiments will be displayed oldest to newest in the tt report.
- You can select up to 10 experiments for comparison.
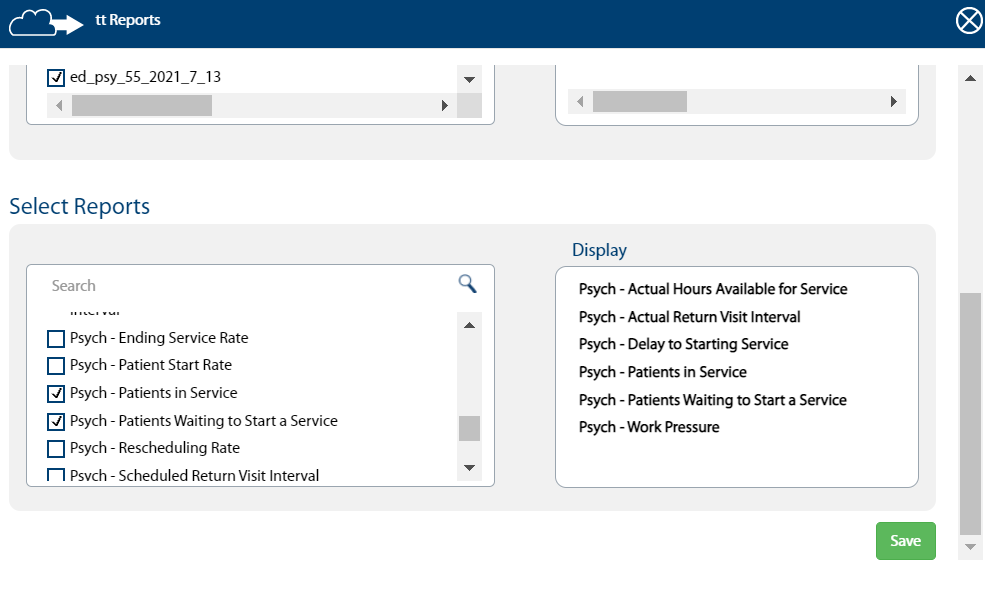
Under Select Reports, check the boxes of charts you want to display. Selected charts will appear on the Display list to the right. Click Save when done.
- The charts will display in order of appearance on the list in the tt report.
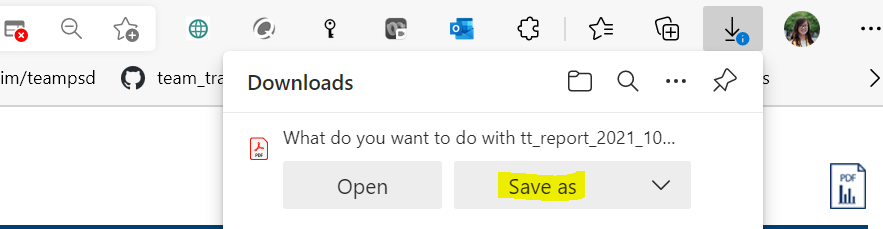
Sign into mtl.how/menu and select your team. Click on the PDF icon on the upper right hand side of the page to download an export of your tt report.
- The page will load for a few seconds before giving you an option to download your report by clicking Save As.

9.5.2 Set up a Red TT Report
- The NIH-Red tt report only contains team data. Do not select charts to display.
- Team data cannot be read directly, it must be converted to an experiment.
- There is a special button in the Team Setup popup for the team data to experiment conversion.
- The team data file must be uploaded before using this procedure.
- Select Team Setup from the Facilitator Dashboard. The Set Setup popup will appear.
- Select the team data file you want to use in the Red tt report and click the Add to tt button.
- Select the desired model.
- Select the desired team from the dropdown and click Done.
- Close the Team Setup popup and click on the tt Admin button. The tt Admin popup will appear.

- Select the desired team and modules from the dropdowns. Select the tt red experiment to display in the teams’ report.

Scroll down and click Save.
Sign into mtl.how/menu and select your team. Click on the PDF icon on the upper right hand side of the page to download an export of your tt report.
- The page will load for a few seconds before giving you an option to download your report by clicking Save As.

9.6 Team
- The Team button in the top navigation is for texting and maintaining private discussion threads with one or more individuals and open discussion threads with teams.
- A person can chat with one or more people using the Team function by inputting the end user name (usually the va.gov email address) of the person or people they want to address.
- A person can chat with with an entire team at once, provided they are a registered end user in that team.
9.6.1 Set up a Private Conversation

- Click Team to open the chat popup. Note how the Team icon has a red circle indicating there are 2 chats waiting.

- Click Chat in the left-hand navigation to private-text an individual. The latest conversation will appear in the Chat Log, followed the the next recent. The discussion thread appears in the Conversation window.

- To continue a conversation, type a new message in the message line at the bottom of the window. Click the send icon to post the chat.

- To start a conversation with one or more new people, click the New icon and enter their user name and click Add. Type a new message and click send.
9.6.2 Set up an Open Team Discussion

- Click on the Team icon in the left hand navigation. Note how the icon has a red circle indicating there are 2 chats waiting.

- The Teams listing will contain a list of all teams the individual is a registered end user (see blue-green highlight). A boldface team indicates a chat is waiting. **Note the listing contains _ind teams. These are teams where users are assigned an individual world with which to experiment. However, any discussions held in this thread will be visible by all registered users from their different worlds.** To have a private chat with an individual, see Set up a Private Conversation above.
## Resize a Window for Side-by-Side Viewing
- A facilitator may need to show two items on the screen side-by-side for comparison.
- The Sim UI has a responsive design that should accommodate many resolutions and browser window sizes.
- Follow the steps below to get the best view.

- Click the “window” icon in the upper right of the browser window.

- Drag the browser window to the desired size. Notice how the Sim UI design responds by stacking menu icon.

- Sometimes items on the screen are cutoff or not formatted correctly. Click the refresh button so the browser can detect the new window size and adjust the format.

- If the format is still not optimum, decrease the zoom below 100% to reduce the size of the items on the screen, or drag the screen slightly larger.